Thursday, June 30, 2016

AEM6 | Customize create page wizard

To customize OOTB create page wizard you should perform following step(s) depending on the type of customization you are looking for-

1. Customize the template fields shown in wizard step-2

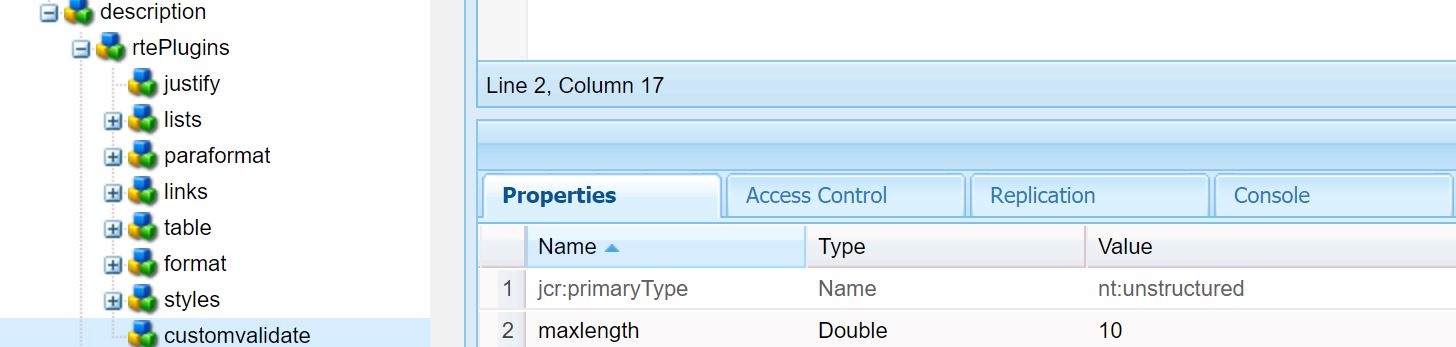
First, you need to override the cq:dialog of page component to configure what fields should be shown in create page wizard. In this dialog set the following property to true which you want to display in page create wizard-


cq:showOnCreate
Boolean
true


2. Customize the template selection step in wizard step-1

You need to write a clientlib file with following code to handle the template selection step-

This example explains how to auto select the template if only one template is available for selection-
$(document).on("foundation-contentloaded", function(e) {
    if (($(".foundation-collection-item").length==1) && ($(".foundation-collection-item.selected").length == 0)) {
        $('.foundation-collection-item').click();
        $(':button.coral-Wizard-nextButton').click(); 
    }
});

Category of the clientlibs can be any of this depending on your requirement- 
app.myproject.createpagewizard, cq.gui.siteadmin.admin.publishwizard, dam.gui.admin.publishassetwizard

In order to attach this new clientlibs to create page wizard, you need to overlay the wizard's head component and add your custom category i.e. "app.myproject.createpagewizard" as shown in below diagram-


3. Customize the confirmation Step-3

Once you have submitted the create page form, there comes a popup window for confirmation, if you want to modify the form submit behavior then you can do following customization-

(function(window, document, Granite, $) {
    "use strict";
    var ui = $(window).adaptTo("foundation-ui");

    function createPage(wizard) {
        $.ajax({
            type: wizard.prop("method"),
            url: wizard.prop("action"),
            contentType: wizard.prop("enctype"),
            data: wizard.serialize()
        }).done(function(html) {
            var $html = $(html);
            var edit = $html.find("a.cq-siteadmin-admin-createpage-edit");
            window.location = edit.prop("href");
        }).fail(function(xhr, error, errorThrown) {
            if (error === "error") {
                var $html = $(xhr.responseText);
                if ($html.find(".foundation-form-response-status-code").length > 0) {
                    var title = $html.find(".foundation-form-response-title").next().html();
                    var message = $html.find(".foundation-form-response-description").next().html();
                    ui.alert(title, message, "error");
                    return;
                }
            }
            ui.alert(error, errorThrown, "error");
        });
    }

    function submit(wizard) {
        var flag = true;
        if (flag == true && (wizard.prop("template").value.indexOf("/apps/myproject/templates/testTemplate") >= 0)) {
            $.ajax({
                url: "/bin/someservletpath/submit",
                method: "GET",
                data: {
                    url: wizard.prop("parentPath").value,
                    pageTemplate: wizard.prop("template").value
                },
                dataType: "html"
            }).done(function(res) {
                wizard.prop("parentPath").value = res;
                createPage(wizard);
            }).fail(function(res) {
                ui.alert(res, "error");
            });
        } else {
            createPage(wizard);
        }
    }

    $(document).on("submit", ".cq-siteadmin-admin-createpage", function(e) {
        e.preventDefault();
        submit($(this));
    });

})(window, document, Granite, Granite.$);

As mentioned in #2 above the category of clientlibs should be "app.myproject.createpagewizard" and associated to create page wizard via head component overlaying.

Sunday, June 19, 2016

Control component rendering in Touch UI Dialogs

RenderCondition comes very handy when you want to control rendering of your dialog. You can restrict display of field, button, tab etc. based on RenderConditions. I am going to take an  example of Carousel component where I will hide a tab panel from dialog to certain users. Consider the component dialog has two tabs- Carousel and List. Now to restrict display of one tab i.e. List to certain users who do not have "Create" access a certain path, perform following steps-

1. Go to cq:dialog component which you want to restrict for rendering, in this case go to - "/apps/myproject/components/carousel/cq:dialog/content/items/list" node

2. Create a new node "granite:rendercondition" of type "nt:unstructured"

3. Add following properties to this new node-
path- Type: String, Value: /content/mysite/en/homepage
privileges- Type: String, Value: jcr:addChildNodes
sling:resourceType-Type: String,Value: granite/ui/components/foundation/renderconditions/privilege

Another resourceType is - granite/ui/components/coral/foundation/renderconditions/simple which supports a expression property like this- 
expression="${param.item == '/content/mysite/en' || param.item == '/content/mysite/es'}" 
OR
expression="${granite:relativeParent(param.item, 1)== '/content/mysite'}" To ensure that just first level pages e.g. /content/mysite/en match the render condition.

Refer the screenshot below-


4. Save your changes. And go to useradmin console and revoke "Create" access on the following path- "/content/mysite/en/homepage". You can use regex also for the path value for pattern based matching as per your specific need.

5. Now go back to the page i.e. /content/mysite/en/homepage.html, Open the carousel component dialog, You should observe that the list tab does not appear to the logged in user as  the RenderCondition rule evaluates to false.

For more rendercondition options refer the link here-
https://docs.adobe.com/docs/en/aem/6-1/ref/granite-ui/api/jcr_root/libs/granite/ui/components/foundation/rendercondition.html

Changing Default Favicon of AEM Admin Interface

To change the default favicon of the touch UI admin interface, you need to overlay the /libs/granite/ui/components/foundation/page/favicon/favicon.jsp. Just change this path in your overlayed file and remove the Adobe copyright comment text.

Config cfg = cmp.getConfig();
AttrBuilder attrs = new AttrBuilder(request, xssAPI);
attrs.add("rel", "shortcut icon");
attrs.addHref("href", cfg.get("href", "/libs/granite/core/content/login/favicon.ico"));
// https://en.wikipedia.org/wiki/Favicon#How_to_use
%><link <%= attrs.build() %>>

Change the favicon path highlighted in red above.

Refer the below scrrenshot to overlay the OOTB favicon.jsp-


Wednesday, June 15, 2016

AEM6 | RTE validator plugin

You can use the belowJS for sample validator plugin for Rich text editor-

CUI.rte.plugins.ValidatorPlugin = new Class({

    toString: "ValidatorPlugin",

    extend: CUI.rte.plugins.Plugin,

    /**
     * RTE plugin for maximun length check. If maxlength is set to 0 the validation will not happen. Set a number 
     * greater than 0 for maxlength property.
     */

    /**
     * @private
     */
    alertShown: false,
    errorEl: null,

    /**
     * @private
     */
    _init: function(editorKernel) {
        this.inherited(arguments);
        editorKernel.addPluginListener("beforekeydown", this.handleKeyDown, this, this,
            false);
        editorKernel.addPluginListener("keyup", this.handleKeyUp, this, this,
            false);
        editorKernel.addPluginListener("paste", this.handlePaste, this, this.editContext,
            false);
    },
    handlePaste: function(e, ctx) {
        var k = e.nativeEvent;
        var newtext, existingText, isIE;
        var clp = (k.originalEvent || k).clipboardData;
        var ek = this.editorKernel;
        existingText = $(e.editContext.root).context.textContent;
        if (clp === undefined || clp === null) {
            newtext = window.clipboardData.getData('Text');
            isIE = true;
        } else {
            newtext = clp.getData('text/plain');
            isIE = false;
        }

        var fulltext = existingText + newtext;
        //console.log("hi");
        //console.log("Existing: " + existingText);
        console.log("value: " + fulltext);
        var len = fulltext.length;
        if (len > this.config.maxlength && this.config.maxlength != 0) {

            this.showError(ek, "Maximum character limit: '" + this.config.maxlength + "' reached!");
            $(e.editContext.root).context.textContent = fulltext.substr(0, this.config.maxlength);
            k.preventDefault();
        }
    },

    /**
     * Handles key strokes.
     * @param {Object} e The plugin event
     * @private
     */
    handleKeyDown: function(e, k) {
        //Don't handle delete, backspace and arrow clicks
        if (e.isBackSpace() || e.isDelete() || e.isShift() || e.ctrlKeyPressed ||
            (e.charCode > 32 && e.charCode < 41)) {
            return;
        }
        var context = e.editContext;
        var dpr = CUI.rte.DomProcessor;
        var sel = CUI.rte.Selection;
        var com = CUI.rte.Common;
        var lut = CUI.rte.ListUtils;
        var ek = this.editorKernel;
        /* if(e.charCode==13)
         {
             debugger;

         }*/
        if (!this.isValidMaxLength(e, context)) {
            this.showError(ek, "Maximum character limit: '" + this.config.maxlength + "' reached!");
            e.preventDefault();
            return;
        }
    },
    showError: function(ek, message) {
        if (!this.alertShown) {
            ek.getDialogManager().alert(
                CUI.rte.Utils.i18n("Error"),
                CUI.rte.Utils.i18n(message),
                CUI.rte.Utils.scope(this.focus, this));
            this.alertShown = true;
        } else {}

    },

    /**
     * Handles post-processing required for all browsers. The method is called whenever a
     * key has been pressed.
     * @param {Object} e The plugin event
     * @private
     */
    handleKeyUp: function(e) {},
    isValidMaxLength: function(e, context) {
        if (this.config.maxlength == 0) {
            return true;
        }

        var length = context.root.textContent.length;
        var $contentEditable = $('#ContentFrame').contents().find('[contenteditable="true"]').length ? $('#ContentFrame').contents().find('[contenteditable="true"] p>br') : $('[contenteditable="true"] p>br');
        length += $contentEditable.length;
        if (length >= this.config.maxlength) {
            return false;
        }
        return true;
    },
    notifyPluginConfig: function(pluginConfig) {
        pluginConfig = pluginConfig || {};
        CUI.rte.Utils.applyDefaults(pluginConfig, {
            "maxlength": 0,

        });
        this.config = pluginConfig;
    }

});


//register plugin
CUI.rte.plugins.PluginRegistry.register("customvalidate", CUI.rte.plugins.ValidatorPlugin);


Put this js in a clientlibrary folder with category "cq.authoring.dialog".

After that in your component dialog, use the validator as shown below:


AEM6 | Prefill text field with http, mailto

You can use the below sample code to prefill an input text field with URL/ EMail prefixes based on user input. It prefixes mailto syntax if user input forms an email pattern.

(function($) {
    "use strict";
    $(document).on("change", ".js-coral-pathbrowser-input", function(e) {
        // If it's a relative path - do nothing
        if (this.value.indexOf('/') != 0) {
            // It's not a relative path - treat it as either a mail address or webb address
            if ((this.value.indexOf('@') > -1) && (this.value.indexOf('mailto:') == -1)) {
                // It's a mail address
                $(this).prop("value", 'mailto:' + this.value);
            } else if ((this.value.indexOf('http://') == -1) && (this.value.indexOf('https://') == -1) && (this.value != "") && (this.value.indexOf('mailto:') == -1) && ($(this).parent().parent().hasClass('js-cq-TagsPickerField') == false)) {
                // It's a webb address
                $(this).prop("value", 'http://' + this.value);
            }
        }
        if (this.value.indexOf(' ') >= 0) {
            $(this).prop("value", $.trim(this.value));
            $(this).prop("value", this.value.replace(new RegExp(' ', 'g'), '%20'));
        }
    });
})(Granite.$);

You need to put the above code in a clientlibs JS file with category "cq.authoring.dialog".

AEM6 | Auto populate title field based on Path browser path selection

To auto populate page title in a title field based on path value selected in path browser field, you can refer following code snippet-

$(document).ready(function() {
    var textInput;
    var textToInput;
    var inputText;
    var ui = $(window).adaptTo("foundation-ui");
    var s = $(document).on("dialog-ready", function() {
        textInput = $('.js-coral-pathbrowser-button').parent().prev();
        textToInput = $('.js-coral-pathbrowser-button').parent().parent().parent().parent().parent().parent().parent().find("input[name='./page'].coral-Form-field");
      
        $(document).on("click", ".js-coral-pathbrowser-confirm", function() {
            setTimeout(function() {
                inputText = $(textInput).val();
                //$(textToInput).val(inputText.substring(inputText.lastIndexOf("/")+1).split('.')[0]);
                if (!$(textToInput).val()) {
                    $(textToInput).val(inputText.substring(inputText.lastIndexOf("/") + 1));
                }
            }, 1000);
        })
        $(document).on('click', '.js-coral-pathbrowser-button', function() {
            textInput = $(this).parent().prev();
            textToInput = $(this).parent().parent().parent().parent().parent().parent().parent().find("input[name='./page'].coral-Form-field");
        })
        $(document).on("change", " .js-coral-pathbrowser-input", function() {
            inputText = $(this).val();
            if (inputText.indexOf("/content") > 0) {
                textToInput = $(this).parent().parent().parent().parent().parent().parent().parent().find("input[name='./page'].coral-Form-field");
                
                if (!$(textToInput).val()) {
                    $(textToInput).val(inputText.substring(inputText.lastIndexOf("/") + 1));
                }
            }
        });
    });
});

Change the field selector input[name='./page'].coral-Form-field as per your dialog configuration where the title value is to be auto populated.

You need to put the above code in a clientlibs JS file with category "cq.authoring.dialog".

AEM6 | Restriction on size in multifield

Following sample code can be used to put size restriction in a multifield -

1. Add a new property- "maxlinksallowed" to the multifield node in your cq:dialog. Refer the screenshot below-


2. Use this JS code-

$(document).on("dialog-ready", function () {
$(".js-coral-Multifield-add").click(function() {
    var field = $(this).parent();
    var size = field.attr("data-maxlinksallowed");
    if (size) {
        var ui = $(window).adaptTo("foundation-ui");
        var totalLinkCount = $(this).prev('ol').children('li').length;
        if (totalLinkCount >= size) {
            ui.alert("Warning", "Maximum " + size + " links are allowed!", "notice");
            return false;
        }
    }
});
});

You need to put the above code in a clientlibs JS file with category "cq.authoring.dialog".


AEM6 | Hide a field based on the User Role in a Dialog

If you need to hide a field in a dialog based on User role i.e. user group, you can do it through an Ajax call-

$.ajax({
    type: "GET",
    url: "/libs/granite/security/currentuser.json.rw.userprops.json?props=declaredMemberOf",
    cache: false
}).done(function(data, textStatus, jqXHR) {
    var isMember = false;
    /* The Group ID for which the widget has to be disabled */
    var groupId = "site-editor";
    var membershipInfo = data.declaredMemberOf;
    if (membershipInfo) {
        for (var membershipIdx = 0; membershipIdx < membershipInfo.length; membershipIdx++) {
            if (membershipInfo[membershipIdx].authorizableId == groupId) {
                isMember = true;
                break;
            }
        }
    }
    /*This example disables the Hide in Navigation checkbox on Page Properties dialog of the page*/
    if (isMember) {
        $('[name="./hideInNav"]').prop('disabled', 'true');
    }
});

Ajax call should be invoked at "dialog-ready" event of document. You need to put the above code in a clientlibs JS file with category "cq.authoring.dialog". 

AEM6 | Tag field validation

As mentioned in previous post, AEM6 uses Coral UI framework for touch UI rendering. So if you need to implement field validation, you should register a validator on that field supported by Coral UI.

To implement validation on tag input field you can use the following sample code.


1. In your tagspicker input field add one property- tagsMessage (Set value to the validation message). Look at the screenshot below-


2. Create a clientLibs Folder with category- "cq.authoring.dialog" and add a JS file having following code-

;(function($, $document) {
    "use strict";
    $document.on("dialog-ready", function() {
        //Register Tag Field Validator
        $.validator.register({
            selector: "input.js-coral-pathbrowser-input",
            validate: function(el) {
                var field = el.parent().parent();
                var message = field.attr("data-tagsMessage");
                if (message) {
                    var taglist = field.parent().find("ul[data-init~=taglist] li");
                    var length = taglist.length;
                    if (length == 0) {
                        var message = field.attr("data-tagsMessage") + "";
                        return message;
                    }
                }
            }
        });

        // Register to listent custom event 'custom-tagpicker-tag-selected' 
        $("input.js-coral-pathbrowser-input").on('custom-tagpicker-tag-selected', function(event) {
            var el = $(this);
            el.checkValidity();
            el.updateErrorUI();
        });

    });


    //Below code triggers a custom event when a new tag is selected from tag browser so that field can       be revalidated
    $(document).on("foundation-contentloaded", function(event) {
        var rel = ".js-cq-TagsPickerField",
            rel2 = ".tagspicker";

        var $target = $(event.target);
        var $pathBrowser = $target.find(".js-cq-TagsPickerField.coral-PathBrowser");
        $pathBrowser.each(function() {
            var tagBrowser = $(this).data("pathBrowser");
            var $input = tagBrowser.inputElement;
            // Handle selections from the PathBrowser picker
            tagBrowser.$picker.on("coral-pathbrowser-picker-confirm.tagspicker", function(e) {
                $input.val("");
                $input.trigger('custom-tagpicker-tag-selected');
            });
            //Handle keypress event
            tagBrowser.inputElement.off("keypress" + rel2).on("keypress" + rel2, function(e) {
                var $pathBrowser = $(this).closest(rel + ".coral-PathBrowser");
                if (e.keyCode === 13) {
                    e.preventDefault();
                    $input.trigger('custom-tagpicker-tag-selected');
                }
            });

            // Handle type-in from the PathBrowser textfield
            tagBrowser.dropdownList.on("selected" + rel2, function(e) {
                var $pathBrowser = $(this).closest(rel + ".coral-PathBrowser");
                jQuery.get(e.selectedValue + ".tag.json", {},
                    function(data) {
                        if (data !== undefined) {
                            $input.trigger('custom-tagpicker-tag-selected');
                        }
                    },
                    "json");

            });

        });
    });
    //Register Tag Validator ENDS


})($, $(document));


Once you have added this JS to your page, you can call it in any number of fields. You just need to add the one property to the fields(as mentioned in Step 1 above) where you want tag validation.

AEM6 | Input Field validation

AEM6 uses Coral UI framework for touch UI rendering. So if you need to implement field validation, you should register a validator on that field supported by Coral UI. Refer the below example-

Sample code to implement mandatory validation on an Input field with trim function-

1. In your component field properties add two new properties- validation-trim (Set value to true) and trimMessage (Set value to the validation message). Look at the screenshot below-


2. Create a clientLibs Folder with category- "cq.authoring.dialog" and add a JS file having following code-

;(function ($, $document) {
    "use strict";
$document.on("dialog-ready", function() {
//Register Trimmed Value Validator
$.validator.register({
selector: "[data-validation-trim]",
validate: function(el) {
var length = el.val().trim().length;
if (length == 0) {
var message = el.attr("data-trimMessage");
return message;
}
}
});
});
})($, $(document));


Once you have added this JS to your page, you can call it in any number of fields. You just need to add two properties to the fields where you want validation as mentioned in Step 1 above.

Tuesday, June 14, 2016

AEM6 | Image upload issue in Internet Explorer from Author Dispatcher

If you came to happen to  face issue with image upload from AEM author through dispatcher, this article may help you. You may face issue when you upload an image from image component or uploading images through Assets dashboard. Performing the following things may fix this issue for you-

1. Increase the Upload Buffer Size from OSGi Console (http://host:port/system/console/configMgr)
   Configure service - "Apache Felix Jetty Based Http Service"
Increase following two parameters- "Request Buffer Size" and "Response Buffer Size" to 65536  or a reasonable limit as per your application requirement.


2.Configure Dispatcher for Increasing request alive
   Open httpd.conf add following lines at the end of file-

  LimitRequestLine 700000

  KeepAlive On
  MaxKeepAliveRequests 150
  KeepAliveTimeout 180

Once changes has been done, you need to restart your web server in order to make changes effective.


3. If you have configured NTLM/ SSO (Single sign on) for your server then you should check following entries in httpd-vhosts.conf file-

SSPIPerRequestAuth Off      (Should be set to off)
SSPIDomain domain.site.com (Domain controller of the server)
SSPIOmitDomain On  

You can find out domain controller value for your dispatcher by running following command-

nltest /dsgetdc:site.com

Here replace site.com with your server's own value.

Hooking to Cache Invalidation in AEM 6.1

If you need to implement custom cache invalidation based on some event, you can write a workflow service or servlet (Which ever suits best to your requirement). In this Java class you can write code to handle this. The OOTB Flush Service can be utilized for this purpose-

    import com.adobe.cq.social.ugcbase.dispatcher.api.FlushService;
    @Reference
    FlushService flushService;

Then you can simply request a cache invalidation for the corresponding page-

flushService.sendFlushUrl("userId",
                    FlushService.FlushType.IMMEDIATE_FLUSH, resourceUrl,
                    FlushService.RefetchType.IMMEDIATE_REFETCH,
                    new String[] { resourceUrl });

Here resourceUrl is the path of the page without html extension.

In order to make the flush service working properly, create flush agents for each dispathcer with following additional settings-

1. Set the Request method - "POST" because this service expects a POST method flush agent.
2. Send additional parameter for "resource only replication" 

-To debug any issues you can add a custom logger from OSGi configurations console on this package-
com.adobe.cq.social.ugcbase.dispatcher.impl.FlushServiceImpl

ACM AEM Commons tool also provides options to help implementing cache invalidation for you through OSGi configurations. Refer the article here-
http://aemtuts.com/how-to-flush-particular-cached-files-when-resource-are-replicated/

CDN | Clearing Cloudflare cache

In order to clear Cloudflare cache automatically via code, follow below steps: 1. Develop Custom TransportHandler Develop a custom Trans...